Pietro Rea
Deleting Derived Data with Automator
July 31, 2020Anyone who spends any significant time in Xcode has to delete the Derived Data directory from time to time. When you have an odd indexing problem that doesn’t go away, like faulty auto-complete, deleting Derived Data usually solves it.
This used to be much easier in Xcode 7 circa 2015, but ever since Xcode 8 there’s been no dedicated button to delete Derived Data. The workflow for doing this manually consists of going to Preferences > Locations in Xcode, then clicking into the Derived Data location and deleting the directory in Finder.
That’s fine, but it takes 4-5 manual steps. There’s a much faster way of deleting Derived Data that I’ve been using for a couple of years now. And you get to use Automator!
Start with a bash script
The first thing you can do to make your life easier is to write a quick bash script to execute from the command line. The default location of the DerivedData directory has not changed in years so it’s fairly safe to hardcode the path in your script.
#!/bin/bash
echo Removing Derived Data...
rm -rf ~/Library/Developer/Xcode/DerivedData
echo RIP Derived Data
Save it wherever you want. I call mine rm-derived-data.sh. Before you can run it, you have to make it executable with chmod like this:
chmod +x ./rm-derived-data.shWhenever you need to delete Derived Data you can just execute this bash script and you’re done. To make it easier on you, you can also export the path to this script into your shell’s $PATH so you can run it from any directory in Terminal.
Automator App
Running the script in Terminal is fine but I wanted something that could hook into Spotlight, which I use as a launcher all day every day. To that end, I learned that I could turn any script into an app using Automator. Once you do this, you can search for and execute the script from Spotlight. And if you save your Automator app in iCloud, this utility will be available on all of your machines without having to worry about syncing.
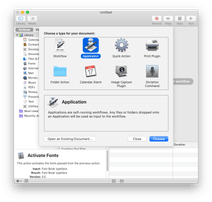
First, open Automator and select Application.

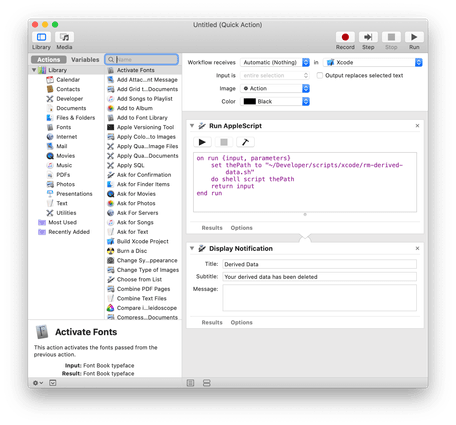
This Automator app consists of two steps, Run AppleScript and Display Notification. Find them in the list of steps and drag them into the right pane.
The AppleScript you need for the first step calls the bash script from earlier. Remember to replace thePath with the path where you saved your script.
on run {input, parameters}
	set thePath to "~/Developer/scripts/xcode/rm-derived-data.sh"
	do shell script thePath
	return input
end run
Note that Automator also has a “Run Shell Script” step and a “Run JavaScript” step that you could have used instead. But since this is Automator, I wanted to go full Sal Soghoian.
The Display Notification step is optional. I added it because I noticed that deleting Derived Data can take up to a few minutes for a large app (!) and I like to know when it’s safe to build again.
The final Automator App should look like this:


Save your work. I named my app Derived Data Exterminator because I like the mental image of the Automator robot going up against my Derived Data directory.
As I mentioned before, you can save this app in iCloud if you want it to be available on all your machines. I saved my Automtor app in iCloud but I decided to save the bash script with all my other dev scripts, so I don’t get seamless syncing for free. If this is important to you, you should look into using “Run Shell Script” instead of “Run AppleScript”.
Time to test it! For best results, I like to close Xcode first. Hit Cmd + Spaceto fire up Spotlight and start typing the name of your Automator app. As soon as you select it you’ll see a little gear in your menu bar. Once the script is done running you’ll see a notification.


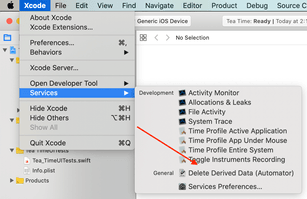
Running the Automator app is my preferred method of deleting Derived Data but I learned recently that you can also use Automator to inject a menu item into Xcode.
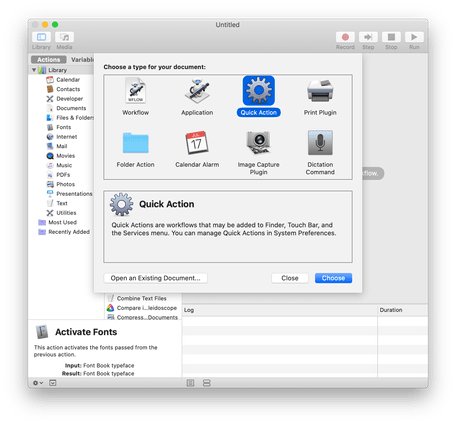
Open Automator again but this time select Quick Action instead of Application.
In the top section, change Workflow receives to no input and select your installation of Xcode in the drop down next to it. Next, drag the same Run AppleScript and Display Notification steps like before and fill them the same way. This is what the end result looks like:
Save your work. I named my Quick Action Delete Derived Data (Automator). In Xcode, it will start showing as a menu item up under Xcode > Services.

A word of caution
When you delete Derived Data you’re blowing away the data for all the apps you’ve built. This might be fine if you only work on one app at a time but if you work on several large projects at the same time you’re going to slow down your workflow.
Although there’s no official documentation about what gets dumped in there (that I could find), it helps to build an intuition about the kinds of problems that you can solve by deleting Derived Data. I only do it if I’m experiencing type ahead or code completion problems, or if the error in Xcode points to a file in Derived Data (this sometimes happens with Interface Builder files). I’m assuming Apple removed this button for good reasons so make sure you’re not willy-nilly blowing away your Derived Data every time you clean your build.
